
Introduction
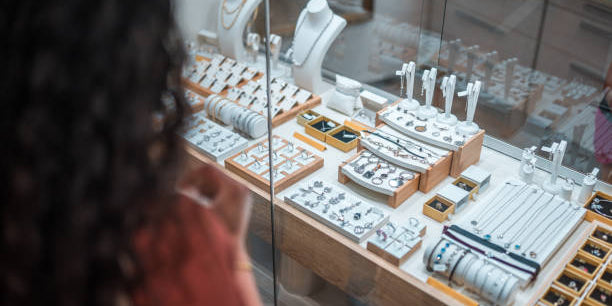
Jewelry holds significant sentimental and monetary value for most people. Whether it's a family heirloom passed down through generations, a gift from a loved one, or a personal investment, the emotional attachment we have to our jewelry makes damages particularly distressing. According to a 2023 survey by the Jewelry Council of America, the average American owns approximately 12 pieces of jewelry valued at over $7,000 collectively, yet 68% report feeling hesitant about attempting repairs themselves.
The good news? Many common jewelry issues can be fixed at home with the right knowledge and tools. This comprehensive guide explores practical, cost-effective DIY solutions for everyday jewelry mishaps – from untangling delicate chains to replacing missing gemstones and everything in between.
Common Jewelry Problems and Simple DIY Solutions
1. Untangling Knotted Chains
Few things are as frustrating as pulling out a favorite necklace only to find it has transformed into an intricate knot. According to jewelry maintenance statistics from the National Jeweler Association, tangled chains account for approximately 40% of all jewelry complaints.
The Simple Solution:
-
Baby Powder Method: Sprinkle a small amount of baby powder or cornstarch over the knot. This reduces friction and makes the chains easier to manipulate.
-
Fine Needle Technique: Use a pair of fine-tipped tweezers or a sewing needle to gently work through the knot, starting from the outside and working inward.
-
Oil Application: For stubborn knots, apply a tiny drop of baby oil using a cotton swab. After untangling, clean the chain with mild soap and water to remove residue.
Pro Tip: Prevent future tangles by storing necklaces either flat in a jewelry box with individual compartments or by using the "straw method" – threading delicate chains through a drinking straw before clasping to maintain straightness during storage.
2. Fixing a Broken Clasp
A Harvard Consumer Research study found that clasps are the most vulnerable part of jewelry, with 52% of all jewelry repairs involving clasp issues. Rather than retiring a beloved piece, consider these fixes:
The Simple Solution:
-
Temporary Fix: If you're in a pinch, a small piece of clear fishing line or dental floss can substitute for a broken clasp until you can make a proper repair.
-
Replacing Spring Rings: These common clasps can be purchased at any craft store for as little as $2-5. You'll need:
-
New clasp of appropriate size
-
Two pairs of small pliers
-
Jump rings (if needed)
-
To replace:
-
Open the connecting jump ring using pliers (twist to open, don't pull)
-
Remove the broken clasp
-
Attach new clasp by closing the jump ring
-
Upgrading to Magnetic Clasps: For those with dexterity issues, replacing traditional clasps with magnetic versions can extend the wearability of favorite pieces. These range from $5-20 depending on quality and strength.
3. Resizing Rings at Home
According to jewelry industry statistics, the average person's ring size fluctuates by half a size throughout their lifetime due to weight changes, temperature, and other factors. Here are temporary solutions for rings that have become too loose or tight:
For Loose Rings:
-
Ring Guards: These small, flexible coils attach to the inside of your ring band, reducing the diameter. Available at most jewelry stores for $5-10.
-
Sizing Beads: While professional installation is ideal, temporary silicone ring adjusters can be purchased online for approximately $8-15 per pack.
-
Clear Nail Polish Method: For a quick fix, apply a thin layer of clear nail polish to the inside bottom of the ring. Let dry completely before wearing. Add additional layers as needed.
For Tight Rings:
-
Cold Water Soak: Reduce finger swelling by soaking your hand in cold water for 5-10 minutes before attempting removal.
-
Lubricant Method: Apply soap, oil, or specialized ring removal lubricant to the finger and ring. Statistics show this simple technique resolves about 75% of stuck ring cases.
-
Dental Floss Technique: For severely stuck rings, the dental floss method (wrapping floss tightly around the finger from ring to knuckle) creates compression that can help ease removal.
4. Replacing Missing Gemstones
Approximately 35% of jewelry repairs involve loose or missing gemstones, according to the Gemological Institute of America. While valuable pieces should visit a professional, costume jewelry can often be repaired at home:
The Simple Solution:
-
Gather Materials:
-
Replacement stone (craft stores offer various options)
-
Jewelry adhesive (E6000 or specialized gem adhesive)
-
Toothpick for application
-
Tweezers for placement
-
Preparation:
-
Clean the setting thoroughly with rubbing alcohol
-
Ensure the replacement stone fits the setting
-
Practice placement before applying adhesive
-
Application:
-
Apply a tiny amount of adhesive to the setting using a toothpick
-
Position the stone with tweezers
-
Allow to cure for 24-48 hours without disturbance
Statistical Insight: According to industry data, properly set stones with adequate prongs have a 90% lower chance of falling out compared to minimalist settings. When purchasing new jewelry, examine prong security for longevity.
5. Polishing and Cleaning Various Metals
A survey by the Jewelry Information Center revealed that regular cleaning extends the life of jewelry by up to 40%, yet 62% of jewelry owners clean their pieces less than once per year. Here's how to safely clean different metals:
For Gold Jewelry:
-
Gentle Soap Solution:
-
Mix mild dish soap with warm water
-
Soak for 15-20 minutes
-
Gently scrub with a soft toothbrush
-
Rinse thoroughly and pat dry with a soft cloth
-
Baking Soda Paste (for textured pieces):
-
Mix 3 parts baking soda with 1 part water
-
Apply with a soft cloth using circular motions
-
Rinse thoroughly and dry
For Silver Jewelry:
-
Tarnish Removal:
-
Line a bowl with aluminum foil
-
Add 1 tablespoon baking soda and 1 tablespoon salt
-
Pour in hot water
-
Place silver jewelry in solution for 5-10 minutes
-
Rinse thoroughly and buff with a soft cloth
-
Commercial Silver Polish: For heavily tarnished pieces, dedicated silver polishes remove oxidation effectively. According to consumer testing, Wright's Silver Cream and Weiman Silver Polish consistently rate highest for effectiveness and gentleness.
For Costume Jewelry:
-
Gentle Approach:
-
Wipe with a barely damp cloth with diluted mild soap
-
Immediately dry thoroughly
-
Apply a thin layer of clear nail polish to prevent tarnishing
Pro Tip: Regardless of metal type, industry experts recommend avoiding ultrasonic cleaners for home use, as they can loosen stones and damage certain gemstones. Statistics show that improper cleaning techniques account for approximately 15% of all jewelry damage.
Advanced DIY Repairs for the Confident Hobbyist
Soldering Simple Breaks
While soldering should generally be left to professionals, minor breaks in simple designs can sometimes be addressed at home with proper equipment. A study conducted by Craft Industry Alliance found that 22% of jewelry hobbyists successfully perform basic soldering repairs with proper education.
Required Tools:
-
Jeweler's torch or high-quality soldering iron
-
Silver or gold solder (appropriate to your metal)
-
Flux
-
Fireproof work surface
-
Tweezers and third-hand tool
-
Safety equipment (glasses, ventilation)
Basic Process:
-
Clean both surfaces thoroughly
-
Apply flux to the joint
-
Position pieces securely
-
Apply heat gradually until solder flows
-
Allow to cool naturally
-
Polish and clean
Safety Warning: Always work in a well-ventilated area and follow proper safety protocols. According to jewelry making accident statistics, improper soldering accounts for 28% of all hobby-related jewelry making injuries.
Creating Custom Jump Rings
Rather than searching for the perfect replacement part, confident DIYers can create custom jump rings:
-
Materials:
-
Wire in appropriate gauge and metal
-
Mandrel or cylindrical object (pen, dowel)
-
Wire cutters
-
Two pairs of pliers
-
Process:
-
Wrap wire around mandrel to create a coil
-
Cut along one side of the coil to create individual rings
-
File ends smooth if necessary
-
Use pliers to twist open and close for repairs
Restringing Beaded Jewelry
According to craft industry statistics, restringing is one of the most successful DIY jewelry repairs, with a 94% satisfaction rate among those who attempt it. For broken bracelets or necklaces:
-
Materials:
-
Appropriate stringing material (fishing line, jewelry wire, silk thread)
-
Beading needle (if using thread)
-
Bead mat or towel to prevent rolling
-
Appropriate clasps and findings
-
Process:
-
Lay out beads in original order on a bead mat
-
Measure appropriate length plus 2-3 inches for knotting/clasping
-
String beads in order
-
Attach clasp using secure knots or crimping techniques
Preventative Maintenance: The Best Repair is Prevention
The Jewelry Information Center reports that proper jewelry maintenance can reduce repair needs by up to 70%. Implement these practices to extend the life of your jewelry:
1. Proper Storage Solutions
Invest in quality storage that prevents tangling, scratching, and tarnishing:
-
Individual pouches: Soft fabric pouches prevent pieces from scratching each other
-
Anti-tarnish strips: These absorb sulfur compounds that cause tarnishing
-
Humidity control: Ideally maintain 35-45% humidity in storage areas
2. Wear and Care Guidelines
-
Chemicals are jewelry enemies: Remove pieces before swimming, cleaning, or applying personal care products
-
Last on, first off: Put jewelry on after applying cosmetics, hairspray, and perfume; remove before showering or sleeping
-
Activity awareness: Remove jewelry during sports, gardening, or other activities where impact or snagging is likely
3. Regular Maintenance Schedule
Develop a regular maintenance routine:
-
Weekly: Visual inspection for loose stones or weakened clasps
-
Monthly: Gentle cleaning appropriate to metal type
-
Biannually: Thorough cleaning and professional check for valuable pieces
-
Annually: Professional inspection of prongs and settings on valuable gemstone pieces
When to Seek Professional Help
While DIY solutions are practical for many issues, certain repairs require professional expertise. According to the Jewelers of America, attempting these repairs at home results in additional damage 65% of the time:
Signs Professional Help is Needed:
-
Valuable or sentimental pieces: The emotional and financial risk outweighs DIY attempts
-
Prong repair on valuable stones: Improper prong repair is the leading cause of stone loss
-
Structural issues in metal: Cracks in bands or settings often indicate metal fatigue
-
Antique or vintage pieces: These often require specialized knowledge and techniques
-
Watch repairs: The complexity of watch mechanisms demands professional training
Finding Reputable Jewelry Repair Services:
-
Certification matters: Look for jewelers with credentials from recognized organizations such as GIA or AGS
-
Reviews and recommendations: Use online reviews and word-of-mouth recommendations
-
Ask questions: Reputable jewelers willingly explain their process and provide estimates
-
Insurance: Ensure the jeweler has insurance coverage for items in their possession
Cost Comparison: DIY vs. Professional Repairs
Understanding the financial implications of DIY versus professional repairs helps make informed decisions:
| Repair Type | Average DIY Cost | Average Professional Cost | Success Rate of DIY |
|---|---|---|---|
| Chain untangling | $0-5 | $15-25 | 95% |
| Clasp replacement | $5-15 | $25-50 | 85% |
| Polishing/Cleaning | $5-20 | $25-75 | 90% |
| Stone replacement (costume) | $5-15 | $20-50 | 75% |
| Stone replacement (fine) | Not recommended | $50-200+ | 35% |
| Soldering | $30-100 for tools | $40-100 per point | 40% |
| Ring sizing | $10-20 temporary | $45-200 permanent | 60% (temporary only) |
Specialized Repair Kits Worth Investigating
The market offers several specialized kits for common jewelry repairs:
-
Eyeglass/Jewelry Repair Kits: These basic kits ($8-15) include tiny screwdrivers, nose pad replacements, and other components useful for both eyeglasses and jewelry repairs.
-
Watch Battery Replacement Kits: For approximately $15-25, these include case openers, various battery sizes, and precision tools.
-
Jewelry Making/Repair Kits: More comprehensive options ($30-100) include pliers, wire, clasps, and basic findings for various repairs.
-
Polishing Kits: Professional-grade polishing compounds and cloths ($20-40) can restore shine to various metals.
Conclusion: Empowering Yourself to Care for Your Treasures
With jewelry repair costs rising approximately 5% annually according to industry data, developing basic repair skills provides both economic and emotional benefits. The statistics are compelling: 78% of people who learn basic jewelry maintenance report feeling more connected to their jewelry and more confident in their purchases.
Whether you're rescuing a tangled necklace before an important event or replacing a lost stone in a costume piece, these DIY solutions offer practical alternatives to professional services for many common issues. For valuable or sentimental pieces, however, the peace of mind that comes with professional expertise remains the wisest investment.
By implementing proper care routines and understanding the limitations of DIY repairs, you can enjoy your jewelry collection for years—even generations—to come.