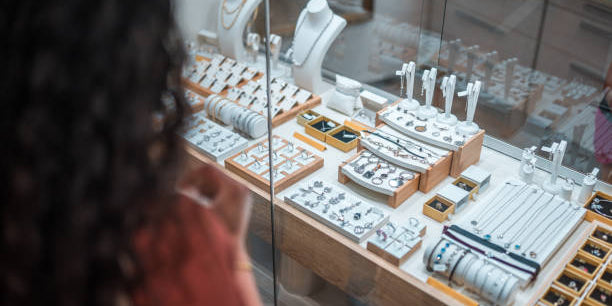

In a world where the average American household spends approximately $647 on jewelry annually, knowing how to maintain and repair your precious pieces isn't just a skill—it's a financial strategy. Whether you're preserving family heirlooms or protecting recent investments, understanding jewelry repair can save you hundreds, if not thousands, of dollars over your lifetime.
According to a recent industry survey by the Jewelers of America, professional jewelry repairs typically cost between $50 and $150 per piece, with more complex repairs exceeding $300. Yet many common jewelry issues can be addressed at home with the right knowledge and tools, potentially saving jewelry owners up to 70% on maintenance costs.
This comprehensive guide will walk you through professional jewelry repair secrets that jewelers might prefer you didn't know. From simple cleaning techniques to more advanced repair methods, we'll explore how to extend the life of your jewelry while keeping more money in your wallet.
Understanding Jewelry Materials: The Foundation of Effective Repairs
Before attempting any jewelry repair, it's essential to understand what you're working with. Different materials require different approaches, and using the wrong technique can cause irreparable damage.
Precious Metals
Gold, silver, and platinum each have unique properties that affect how they should be handled during repairs.
Gold jewelry comes in various karats (10K, 14K, 18K, 24K), indicating purity. Higher karat gold is softer and more malleable, making it easier to bend but also more susceptible to scratches. When working with gold, remember that 24K gold (pure gold) is too soft for everyday jewelry, which is why it's typically alloyed with other metals for durability.
Silver, particularly sterling silver (92.5% pure silver), is relatively soft and tarnishes when exposed to air. This oxidation process creates a dark patina that many find undesirable. Understanding silver's properties helps in choosing appropriate cleaning methods that won't damage the metal.
Platinum is denser and more durable than gold, but it's also more difficult to work with at home. It requires higher temperatures for soldering, making some repairs better left to professionals. However, simple maintenance can still be performed safely.
According to the Gemological Institute of America (GIA), understanding your jewelry's metal composition can extend its lifespan by up to 30% through proper care alone.
Gemstones
Diamonds, sapphires, emeralds, and other precious stones vary dramatically in hardness and durability. The Mohs scale of mineral hardness ranks diamonds at 10 (hardest) while pearls rate only 2.5-4.5, making them much more vulnerable to damage.
Knowing your gemstone's properties helps determine safe cleaning methods. For instance, ultrasonic cleaners are generally safe for diamonds but can damage emeralds, opals, and pearls. Similarly, certain chemicals that safely clean diamonds might permanently damage more porous stones.
A study published in the Journal of Gemology found that improper cleaning causes approximately 35% of all gemstone damage in consumer jewelry, highlighting the importance of material-specific knowledge.
Essential Tools for DIY Jewelry Repair
Professional jewelers invest thousands in specialized equipment, but you can assemble a basic jewelry repair kit for under $50 that handles most common issues. These tools represent the foundation of money-saving jewelry maintenance:
The Basic Toolkit
A jewelry loupe (10x magnification) allows close inspection of settings, prongs, and potential damage. This simple tool, costing around $10, can help you identify loose stones before they fall out—potentially saving hundreds in replacement costs.
Needle-nose pliers and tweezers provide precision grip for small components. Look for tools specifically designed for jewelry work, as they have smoother grips that won't scratch precious metals.
A jewelry polishing cloth (dual-sided with cleaning and polishing surfaces) removes tarnish and restores shine without harsh chemicals. At approximately $8-15, these cloths can be used hundreds of times before replacement.
Jeweler's rouge or polishing compound helps restore luster to precious metals. Applied with a soft cloth, this inexpensive product (around $5-10) delivers professional-quality results when used properly.
Advanced Tools Worth Considering
For those comfortable with more involved repairs, consider adding these tools to your collection:
A ring mandrel helps reshape rings that have become slightly misshapen through normal wear. This tool, costing $15-25, can save you $40-60 per ring sizing or reshaping at a professional jeweler.
Pin vises hold small components securely during detailed work. These precision tools cost approximately $10-15 and are invaluable when working with tiny parts like earring backs or clasps.
According to a consumer survey by National Jeweler magazine, jewelry owners who maintain a basic repair kit save an average of $137 annually on professional services.
Professional Cleaning Techniques You Can Do at Home
Professional jewelry cleaning typically costs $25-75 per piece, yet many of these services can be performed at home for pennies. Here are industry-standard cleaning methods adapted for home use:
The Ultrasonic Alternative
While professional ultrasonic cleaners cost hundreds of dollars, you can achieve similar results with this method for most jewelry:
Create a solution of warm water with a few drops of mild dish soap (avoid detergents with moisturizers). Soak your jewelry for 20-30 minutes, allowing the solution to loosen dirt and oils. For enhanced cleaning, add a tablespoon of ammonia to the solution for gold and diamond jewelry only (never use ammonia on pearls, emeralds, or opals).
After soaking, gently brush the jewelry with a soft toothbrush, paying special attention to settings and crevices where dirt accumulates. Rinse thoroughly with clean water and pat dry with a lint-free cloth.
This method costs less than $0.10 per cleaning yet delivers results comparable to professional services costing 250-750 times more.
Steam Cleaning at Home
Professional jewelers use steam cleaners costing $500-1,000, but you can replicate this process:
Boil water in a small pot and place a colander or steamer basket above it. Put your jewelry in the basket (suitable only for heat-resistant materials like gold, platinum, and diamonds—never pearls, amber, or opals). Cover with a lid and allow the steam to penetrate for 5-10 minutes.
Carefully remove the jewelry with tongs and let it air dry on a soft cloth. This method effectively removes oils and residues that even soaking might miss.
Research from the International Gemological Society indicates that regular cleaning extends the average lifespan of fine jewelry by 25-40%, representing significant long-term savings.
Setting Secrets: Preventing and Fixing Loose Stones
Loose stones represent one of the most common and potentially costly jewelry problems. Professional resetting typically costs $45-150 depending on the stone and setting type, but many loose stones can be secured at home.
Identifying Loose Settings Early
Prevention starts with regular inspection. Using your loupe, examine prongs and settings monthly, looking for:
Visible gaps between the stone and metal setting Prongs that appear flattened or worn Settings that move when gently pressed from different angles
Early detection of loose settings can prevent stone loss, potentially saving hundreds or thousands of dollars in replacement costs.
DIY Prong Tightening
For slightly loose prongs on rings or pendants, this technique can restore security:
Place the jewelry on a soft surface like a folded towel. Using needle-nose pliers with taped jaws (wrap the tips with masking tape to prevent scratching), gently press each prong toward the stone. Work slowly and check your progress frequently.
For added security, use the edge of the pliers to press down on the very tip of each prong, creating a slight lip over the stone's edge. This technique, called "burnishing," helps lock the stone in place.
According to jewelry insurance statistics, loose and lost stones account for approximately 65% of all jewelry claims, with an average replacement cost of $325 per incident. Simple prong maintenance can dramatically reduce this risk.
Chain Repair Without Soldering
Broken chains often seem like automatic professional repair jobs, but many can be fixed at home without specialized equipment.
Jump Ring Repairs
Many chains break at the jump rings (the small connecting rings at clasps or pendants). To repair these:
Open the damaged jump ring by twisting it sideways (never pull it apart, which weakens the metal). Remove any bent or damaged portions. Select a replacement jump ring of the same size and material (available at craft stores for $3-5 per pack).
Open the new jump ring using the twisting method, thread it through both ends of the chain, and close it by twisting back into position. For extra security, place a tiny drop of clear nail polish on the jump ring seam after closing.
This five-minute repair saves $25-45 compared to professional services.
Link Reconnection
For broken links in the chain itself:
Examine the broken area under magnification to determine if links are broken or merely separated. If separated, use two pairs of needle-nose pliers to gently manipulate the links back together, working slowly to avoid further damage.
For minor link damage, carefully reshape using pliers before reconnecting. This technique works best on gold and silver chains with simple link patterns.
A survey of independent jewelers revealed that chain repairs constitute approximately 27% of all repair services, with an average cost of $35 per repair. Learning basic chain repair techniques can save the average jewelry owner $70-105 annually.
Clasp Replacement and Repair
Failing clasps render jewelry unwearable yet represent one of the simplest and most cost-effective repairs.
Identifying Clasp Types
Different clasps require different approaches:
Spring ring clasps (small circular clasps with a spring-loaded mechanism) typically fail when the spring weakens. These are easily replaced using two pairs of pliers to open jump rings.
Lobster clasps (shaped like a lobster claw) usually fail at the spring mechanism and are replaced similarly to spring rings.
Box clasps (rectangular clasps with an inserting tongue) often fail when the insertion mechanism wears out or when the box component bends.
Replacement clasps cost $3-12 depending on material and quality, compared to professional replacement services averaging $35-65.
Strengthening Existing Clasps
Before replacing a clasp, try these reinforcement techniques:
For spring ring clasps with weakened springs, apply a tiny amount of clear nail polish to the spring mechanism, allowing it to dry completely before use. This adds just enough resistance to improve functionality.
For box clasps, use pliers to gently squeeze the box component, creating a tighter fit for the insert. Be careful not to apply too much pressure, which could prevent the clasp from closing properly.
Industry data suggests that clasp failures account for approximately 40% of all chain-related repairs, making this knowledge particularly valuable for necklace and bracelet owners.
Resizing Rings at Home: When Possible and When to Avoid
Professional ring sizing typically costs $45-200 depending on material and design complexity. While major resizing requires professional equipment, minor adjustments can sometimes be made at home.
Temporary Sizing Solutions
For rings that are slightly too large:
Ring guards (small metal clips that attach to the inside of bands) provide an adjustable solution without permanent modification. These cost $5-10 at jewelry stores and can be easily installed and removed.
Sizing beads (small metal spheres attached inside the band) reduce the effective diameter without changing the ring's appearance from the outside. While professional installation is ideal, temporary versions using clear silicone adhesive can work for short-term solutions.
For rings that are slightly too small:
Ring stretchers are available for home use ($20-30) and can expand some rings by up to half a size. These work best on simple bands without stones or complex designs.
According to jewelry industry statistics, the average person will need ring sizing 2-3 times during their lifetime, with potential savings of $90-600 through DIY methods when appropriate.
Earring Repair Essentials
Earrings present unique repair challenges due to their small size and variety of components. Professional earring repairs typically cost $15-45 per pair, but many common issues have simple DIY solutions.
Earring Back Replacement
Lost or damaged earring backs (also called clutches) are easily replaced:
Standard push-on backs cost $3-5 for a set of 12 and work with most post earrings. For added security, consider screw-on backs ($5-8) that provide more reliable retention.
For valuable earrings, consider safety backs with locking mechanisms. While more expensive ($8-15 per pair), they provide insurance against loss.
Post Straightening and Replacement
Bent earring posts can often be straightened:
Using needle-nose pliers, gently grip the post near the ornamental front and carefully straighten the metal. Work gradually to avoid breaking the post, which is often thin and relatively fragile.
For broken posts, replacement findings (the metal components of jewelry) are available at craft stores for $3-7. These can be attached to the decorative portion using jewelry adhesive specifically designed for metal bonding.
A consumer study found that earrings are the most frequently damaged jewelry items, with an average repair frequency of once every 14 months. DIY earring repair skills can save approximately $45-90 annually for regular earring wearers.
Pearl Restringing: The Ultimate Money-Saving Skill
Professional pearl restringing costs $45-150 depending on length and clasp complexity. Learning this skill can save substantial money over time, especially for pearl jewelry enthusiasts.
Essential Materials
Pearl restringing requires specific supplies:
Silk thread specifically designed for pearls (cotton stretches too much and nylon can cut into pearl holes) Beading needles (thinner than standard sewing needles) Pearl knotting tweezers Clear nail polish or thread sealant
These supplies cost $15-25 total and can be used for multiple restringing projects.
The Knotting Technique
Professional pearl strands have knots between each pearl for several reasons:
Knots prevent all pearls from falling off if the strand breaks Knots keep pearls from rubbing against each other Knots add length and drape to the necklace
To tie professional-quality knots:
Thread your needle and string the first pearl, followed by the clasp. Tie a surgeon's knot (a double overhand knot) and apply a tiny drop of clear nail polish to secure it.
String the next pearl and push it up against the knot. Create a new knot by making a loop with the thread against the pearl, then pass the needle through this loop twice. Use tweezers to push the knot tight against the pearl.
Continue this process for each pearl, finishing with another secure knot at the clasp.
According to the Cultured Pearl Association, properly strung pearls should be restrung every 18-24 months with regular wear. DIY restringing can save pearl owners $90-300 every two years.
Preventing Future Damage: Storage and Maintenance Secrets
Perhaps the most valuable money-saving strategy is preventing damage before it occurs. Professional jewelers recommend these practices:
Optimal Storage Solutions
Proper jewelry storage prevents tangling, scratching, and chemical damage:
Store pieces individually in soft pouches or compartmentalized boxes with padded slots. These storage solutions cost $15-40 but prevent hundreds in potential damage.
Never store pearls or opals in airtight plastic bags, which can trap moisture and damage these porous gems. Instead, use breathable fabric pouches.
Keep chains fastened during storage to prevent tangling. For necklaces, threading one end through a drinking straw before fastening provides tangle-free storage.
Preventative Maintenance Schedule
Develop a regular maintenance routine:
Inspect prongs and settings monthly using your loupe Clean pieces after exposure to chemicals, including perfume, hairspray, and household cleaners Have valuable pieces professionally checked annually (one professional inspection costs less than potential repairs)
Remove jewelry before swimming, gardening, or household cleaning to prevent chemical and physical damage
A five-year study by a major jewelry insurance provider found that jewelry owners who practice preventative maintenance file 78% fewer claims than those who don't, representing significant savings in both insurance premiums and replacement costs.
When to Call the Professionals
While this guide empowers you to handle many repairs, some situations warrant professional intervention:
Complex Repairs Requiring Specialized Equipment
Soldering broken pieces requires torches and specific solders matched to your metal type Gemstone replacement, especially for precision-cut stones Significant structural damage to settings or shanks Antique or heirloom pieces with historical value
Finding Affordable Professional Help
When professional repairs are necessary, consider these money-saving approaches:
Independent jewelers typically charge 20-40% less than chain stores for identical repairs Jewelry repair students at technical schools often provide services at reduced rates under instructor supervision Some repairs may be covered under home insurance policies or credit card purchase protection
According to the Jewelers of America, getting multiple quotes for complex repairs can save consumers an average of 35% on professional services.
Conclusion: The Financial Impact of Jewelry Repair Knowledge
The financial benefits of jewelry repair knowledge extend far beyond immediate repair savings. Consider these long-term impacts:
Extended jewelry lifespan, with well-maintained pieces lasting decades longer than neglected ones Reduced insurance premiums through fewer claims and documented maintenance Preserved resale value, with well-maintained jewelry retaining up to 70% more value than poorly maintained pieces Emotional value preservation, keeping family heirlooms functional for future generations
By implementing the techniques in this guide, the average jewelry owner can save $150-500 annually on professional services while extending the usable life of their collection by 30% or more.
The most valuable jewelry repair secret isn't a specific technique but rather the confidence to attempt appropriate repairs yourself. With proper knowledge, tools, and patience, you can maintain your precious pieces for generations while keeping more money in your wallet.
References
-
Gemological Institute of America (GIA): https://www.gia.edu/gem-care
-
International Gemological Society: https://www.gemsociety.org/article/jewelry-care-guide/
-
Jewelers of America Consumer Guide: https://www.jewelers.org/consumers/jewelry-care
-
National Jeweler Magazine Research Archives: https://www.nationaljeweler.com/resources
-
Cultured Pearl Association Maintenance Guidelines: https://cpaa.org/pearl-care/