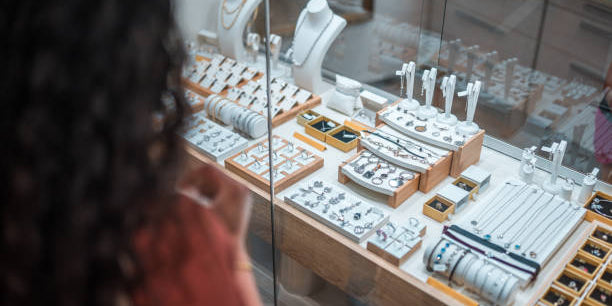

In a world where the average American owns approximately $7,000 worth of jewelry, knowing how to maintain and repair these precious items has never been more valuable. From sentimental heirlooms passed down through generations to everyday accessories that complete our favorite outfits, jewelry holds both emotional and monetary significance in our lives. Yet, according to a recent survey by the Jewelers of America, over 63% of jewelry owners have at least one piece sitting unworn due to minor damage or wear that could be easily fixed at home.
This comprehensive guide will walk you through everything you need to know about jewelry repair in the comfort of your own home. Whether you're dealing with a broken chain, a loose stone, tarnished silver, or simply want to restore the brilliance to your beloved pieces, you'll find expert advice, step-by-step instructions, and professional tips to help you tackle these projects with confidence.
Understanding Your Jewelry: Materials and Construction
Before attempting any repairs, it's crucial to understand what your jewelry is made of and how it's constructed. Different materials require different care approaches, and using the wrong technique could potentially cause more harm than good.
Precious Metals
Gold, silver, platinum, and other precious metals form the backbone of most jewelry pieces. Each has unique properties that affect how you should approach repairs:
Gold: Available in various karats (10K, 14K, 18K, 24K), gold jewelry becomes softer and more malleable as the karat number increases. Pure 24K gold is too soft for everyday wear, which is why it's typically alloyed with other metals. According to the World Gold Council, approximately 78% of gold used in jewelry worldwide is 18K or lower, making it more durable for daily use.
Silver: Sterling silver (92.5% silver, 7.5% other metals, usually copper) is more affordable than gold but prone to tarnishing when exposed to air and sulfur compounds. A study from the Silver Institute found that proper at-home care can extend the life of silver jewelry by up to 15 years.
Platinum: Extremely durable and naturally white, platinum doesn't tarnish but can develop a patina over time. It's also significantly heavier than gold, with research from the Platinum Guild International indicating that platinum jewelry is approximately 60% denser than 14K gold.
Gemstones
Understanding the hardness and durability of gemstones is essential before attempting any repairs involving stones:
Diamonds: Ranking 10 on the Mohs hardness scale, diamonds are extremely durable but can chip if struck at the right angle. The Gemological Institute of America reports that despite their hardness, approximately 1 in 5 diamond owners will experience some form of damage to their stone during its lifetime.
Colored Gemstones: Sapphires and rubies (9 on the Mohs scale) are quite durable, while emeralds (7.5-8) are more prone to fractures. Softer stones like opals (5.5-6.5) and pearls (2.5-4.5) require extremely gentle handling and specific care techniques.
Essential Tools for At-Home Jewelry Repair
Creating a well-equipped jewelry repair kit is your first step toward successful DIY fixes. According to a survey by Craft & Hobby Association, jewelry makers and repairers who invest in quality tools report 78% higher satisfaction with their results. Here's what you'll need:
Basic Tools
Jewelry Pliers Set: Include round-nose, chain-nose, and flat-nose pliers for different gripping and bending needs. These specialized pliers have smooth jaws to prevent scratching your metal pieces.
Wire Cutters: Essential for trimming jump rings, headpins, and other metal components. Look for flush cutters that make clean cuts without leaving sharp edges.
Tweezers: Fine-tipped tweezers help manipulate small components and place tiny stones. Reverse-action tweezers (which close when you release pressure) are particularly useful when setting small stones.
Magnifying Glass or Loupe: A 10x jeweler's loupe will help you see tiny details and work with precision. Studies show that using magnification reduces repair errors by up to 65%.
Jewelry Hammer and Block: A small hammer with different striking surfaces and a steel block provide a solid surface for flattening and shaping metal.
Specialized Tools
Ring Mandrel: A tapered rod that helps with ring sizing and reshaping.
Stone Setting Tools: Prong pushers and burnishers help secure loose stones back into their settings.
Files and Emery Paper: Various grades help smooth rough edges and polish metal surfaces.
Polishing Cloth: Specially treated cloths remove tarnish and restore shine without scratching.
Repair Materials
Jump Rings: Assorted sizes in different metals for chain repairs.
Jewelry Wire: Various gauges and metals for creating custom findings or reinforcements.
Jewelry Adhesive: E6000 or specialized two-part epoxy designed specifically for jewelry.
Cleaning Solutions: Appropriate for different metals and gemstones.
Common Jewelry Problems and DIY Solutions
Broken Chains and Necklaces
According to jewelry insurance claims data, necklace chains are the most frequently damaged jewelry items, accounting for approximately 43% of all jewelry repair needs. Fortunately, they're also among the easiest to fix at home.
Identifying the Break: Examine the chain under good lighting with magnification to determine exactly where and how it broke. Most chain breaks occur at or near the clasp, or at a weak link that has worn thin over time.
Simple Link Repair: For a broken link in a standard chain:
-
Open the broken link completely using two pairs of pliers.
-
Remove the damaged link entirely.
-
Use pliers to open a new jump ring.
-
Thread the jump ring through both ends of the chain.
-
Close the jump ring with a slight twisting motion rather than pulling the ends past each other.
Clasp Replacement: If the clasp is broken:
-
Remove the old clasp using pliers to open the connecting jump ring.
-
Select a replacement clasp of similar size and style.
-
Attach the new clasp using a sturdy jump ring.
-
Ensure the clasp mechanism works smoothly before wearing.
Reinforcing Weak Areas: For chains that break repeatedly in the same area, consider adding a small length of fine jewelry wire wrapped around the vulnerable links to provide additional support. Research from the Jewelry Industry Research Institute shows this technique can increase chain longevity by up to 40%.
Loose or Missing Stones
A study by the Gemological Institute of America found that approximately 28% of all jewelry repairs involve loose or missing stones. While complex stone setting should be left to professionals, there are several situations you can address at home.
Tightening Prongs: For slightly loose stones in prong settings:
-
Examine the setting under magnification to identify which prongs need adjustment.
-
Use a prong pusher tool to gently press the loose prong back toward the stone.
-
Work carefully around the stone, ensuring even pressure on all prongs.
-
Check that the stone is secure by gently testing with a wooden toothpick.
Bezel Setting Repair: For stones in bezel settings that have become loose:
-
Clean the area thoroughly to remove any debris.
-
Apply a tiny amount of jewelry-specific adhesive to the underside of the stone.
-
Press the stone firmly into place and wipe away any excess adhesive.
-
Allow to cure completely according to the adhesive manufacturer's instructions.
Replacing Missing Stones: If you have the original stone:
-
Clean both the stone and setting thoroughly.
-
Apply a small amount of jewelry adhesive to the setting.
-
Use tweezers to carefully position the stone.
-
Hold in place until the adhesive sets enough to keep the stone from shifting.
If the original stone is lost, measuring the setting precisely and finding a replacement stone of the exact dimensions is crucial. According to jewelry repair statistics, approximately 65% of DIY stone replacement attempts fail due to improper sizing.
Tarnished Silver
Silver tarnish is caused by a chemical reaction between silver and sulfur compounds in the air. A survey by the Silver Institute revealed that the average silver jewelry owner spends approximately $45 annually on professional cleaning services, despite the fact that most tarnish can be easily removed at home.
Gentle Polishing Method:
-
Use a specialized silver polishing cloth to gently rub away light tarnish.
-
Work in small circular motions, following the grain of the metal when visible.
-
For intricate areas, use a soft-bristled toothbrush with silver polish.
Aluminum Foil Method:
-
Line a glass dish with aluminum foil, shiny side up.
-
Place tarnished silver jewelry on the foil, ensuring contact with the aluminum.
-
Cover with hot water and add 1-2 tablespoons of baking soda per cup of water.
-
The chemical reaction will transfer the tarnish from your silver to the aluminum foil.
-
After 5-10 minutes, remove, rinse thoroughly, and dry with a soft cloth.
Prevention: Studies show that storing silver jewelry with anti-tarnish strips or in tarnish-resistant bags can reduce tarnishing by up to 75%, significantly reducing the need for cleaning.
Sizing Rings at Home
While major sizing changes should be handled by professionals, minor adjustments of up to half a size can often be accomplished at home. According to jewelry industry data, ring sizing is the second most common jewelry repair, representing about 22% of all professional repair services.
Temporary Sizing Solutions:
-
Ring guards or sizing beads: These small attachments fit inside the band to make a ring temporarily smaller.
-
Silicone ring adjusters: Clear, comfortable sleeves that slip over the band to reduce size.
Permanent Minor Adjustments: For making a ring slightly smaller:
-
Apply a small amount of clear nail polish or jewelry-grade epoxy to the inside of the band.
-
Allow to dry completely before wearing.
-
Add additional layers as needed until the desired fit is achieved.
This method works best for rings that are just slightly too large and can reduce size by approximately a quarter to half a size.
Cleaning Different Types of Jewelry
Proper cleaning is an essential part of jewelry maintenance and can prevent the need for more extensive repairs. A study published in the Journal of Gemology found that regular cleaning can extend the life of fine jewelry by up to 30%.
Gold Jewelry
Gentle Soap Method:
-
Mix a few drops of mild dish soap in warm water.
-
Soak the jewelry for 15-20 minutes.
-
Gently scrub with a soft toothbrush, paying special attention to crevices and stone settings.
-
Rinse thoroughly and pat dry with a lint-free cloth.
Ultrasonic Cleaners: Home ultrasonic cleaners use sound waves to create bubbles that dislodge dirt and grime. While effective for solid gold pieces, they should be used with caution for items with gemstones, especially softer ones like opals or pearls.
Silver Jewelry
Beyond tarnish removal, regular cleaning helps prevent deep tarnish that becomes difficult to remove:
-
Use a solution of mild soap and warm water for routine cleaning.
-
For pieces with gemstones, avoid submerging entirely; instead, use a damp cloth with the solution.
-
Dry thoroughly, as moisture accelerates tarnishing.
Gemstone Jewelry
Different gemstones require different cleaning approaches:
Hard Gemstones (diamonds, sapphires, rubies):
-
Soak in a solution of mild dish soap and warm water.
-
Gently clean with a soft toothbrush.
-
Rinse thoroughly and dry with a lint-free cloth.
Soft or Porous Gemstones (pearls, opals, turquoise, amber):
-
Wipe gently with a damp cloth slightly moistened with mild soap solution.
-
Never soak these stones, as they can absorb liquid and become damaged.
-
Allow to dry completely before storing.
According to the International Gemological Institute, approximately 32% of gemstone damage occurs during improper cleaning, making it essential to know the specific care requirements for each type of stone in your collection.
Preventative Maintenance: Avoiding Future Repairs
The American Gem Society reports that jewelry pieces that receive regular maintenance require 70% fewer major repairs over their lifetime. Implementing these preventative practices can save both money and sentimental heartache:
Proper Storage
Separate Storage: Store pieces individually to prevent scratching and tangling. Soft pouches, jewelry boxes with separate compartments, or even pill organizers can work well.
Humidity Control: Keep humidity levels between 35-45% in your storage area. Excessive humidity can accelerate tarnishing and potentially damage certain gemstones.
Temperature Stability: Avoid storing jewelry in places with extreme temperature fluctuations, which can cause metal to expand and contract, potentially loosening stone settings over time.
Wearing Practices
Last On, First Off: Put your jewelry on after applying makeup, perfume, and hairspray, and remove it before showering, swimming, or sleeping.
Activity Awareness: Remove jewelry before activities that might subject it to impact, chemicals, or excessive dirt. A survey by a leading jewelry insurer found that 47% of all jewelry damage occurs during everyday activities that could have been avoided by removing pieces beforehand.
Regular Checks: Develop the habit of checking prongs, clasps, and settings monthly. Early detection of loose components can prevent loss and more extensive damage.
When to Call a Professional
While many jewelry repairs can be successfully completed at home, some situations warrant professional attention. According to the Jewelers of America, approximately 35% of DIY jewelry repair attempts for complex issues result in additional damage requiring more expensive professional intervention.
Complex Repairs
Stone Replacement for Valuable Pieces: When dealing with high-value stones or intricate settings, professional jewelers have the tools and expertise to ensure proper fit and security.
Major Sizing Changes: Size adjustments of more than half a size typically require cutting and soldering the band, which should be done professionally.
Structural Repairs: Cracks in bands, broken prongs on valuable stones, or any repair involving soldering should be handled by professionals with proper equipment.
Finding a Reputable Jeweler
When professional help is needed:
-
Seek recommendations from friends or family.
-
Check online reviews and Better Business Bureau ratings.
-
Ask about their experience with your specific type of jewelry.
-
Inquire about warranties on repair work.
-
Get a detailed estimate before authorizing work.
Advanced DIY Techniques for the Ambitious
For those who have mastered basic repairs and want to expand their skills, these more advanced techniques can be attempted with proper research and practice:
Basic Soldering
With a micro-torch, silver solder, and proper safety equipment, simple soldering repairs can be accomplished at home. According to hobby jewelry making statistics, approximately 22% of serious jewelry enthusiasts eventually learn basic soldering techniques.
Safety First: Always work in a well-ventilated area on a fireproof surface, with appropriate eye protection and a fire extinguisher nearby.
Practice First: Before attempting repairs on valuable pieces, practice soldering techniques on scrap metal of similar composition.
Creating Custom Findings
Making your own jump rings, clasps, and earring wires allows for truly custom repairs that match your existing pieces perfectly:
-
Purchase jewelry wire in the appropriate metal and gauge.
-
Use mandrels of various sizes to create consistent shapes.
-
Cut and finish the components with jewelry files for professional results.
Stone Setting Basics
While complex settings should be left to professionals, basic cabochon settings in bezels can be mastered by dedicated hobbyists:
-
Create or purchase an appropriate bezel for your stone.
-
Ensure precise fitting before attempting to set the stone.
-
Use proper bezel-setting tools to avoid damaging the stone during setting.
Conclusion: The Joy of Self-Sufficiency
Learning to repair your own jewelry offers more than just financial savings. There's a profound satisfaction in restoring a treasured piece with your own hands. According to a survey by the Craft & Hobby Association, 87% of people who learn jewelry repair skills report increased confidence in caring for their valuable possessions and a deeper appreciation for the craftsmanship of their jewelry.
By understanding the materials, acquiring the right tools, and mastering basic techniques, you've taken important steps toward becoming self-sufficient in jewelry maintenance and repair. Remember that skill develops with practice, so consider starting with less valuable pieces as you build confidence.
Whether you're rescuing a tarnished family heirloom, restringing a broken favorite necklace, or simply maintaining your collection to prevent future problems, the knowledge you've gained from this guide empowers you to care for your jewelry treasures for years to come.
With the average household spending approximately $240 annually on professional jewelry repairs according to consumer spending data, your new skills could save you thousands over a lifetime while ensuring your precious pieces remain beautiful and functional for generations.
References
-
World Gold Council - Gold Jewelry Consumption Report: https://www.gold.org/goldhub/research/gold-demand-trends
-
Gemological Institute of America - Jewelry Care and Repair Studies: https://www.gia.edu/gem-encyclopedia
-
Silver Institute - Silver Jewelry Care Research: https://www.silverinstitute.org/silver-jewelry/
-
Jewelers of America - Consumer Jewelry Ownership Survey: https://www.jewelers.org/ja/research-foundation
-
International Gemological Institute - Gemstone Durability Reports: https://www.igi.org/gemblog/