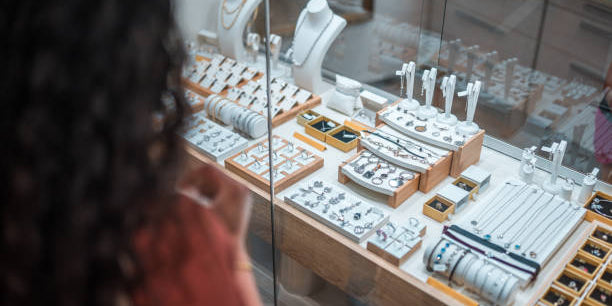

In today's fast-paced world, busy professionals and parents alike often find themselves with little time to address life's small inconveniences—like broken jewelry. That favorite necklace with the broken clasp or that tarnished silver bracelet often ends up forgotten in a drawer because who has time to visit a jeweler? According to a recent consumer behavior study, the average American owns approximately 27 pieces of jewelry, yet 62% report having at least three broken pieces they haven't repaired due to time constraints or cost concerns.
This comprehensive guide offers practical, time-saving jewelry repair solutions that even the busiest individuals can implement. From untangling delicate chains to fixing loose stones, these DIY jewelry repair hacks will help extend the life of your beloved accessories without breaking the bank or consuming your precious time.
Understanding Common Jewelry Problems
Before diving into specific repair techniques, it's important to understand why jewelry fails in the first place. Jewelry items experience wear and tear from regular use, exposure to chemicals, improper storage, and sometimes simply poor craftsmanship. A 2022 survey by the Jewelry Consumer Opinion Council revealed that clasps failing (37%), chains breaking (29%), and stones becoming loose (18%) are the most common jewelry issues people experience.
The average person spends approximately $84 annually on jewelry repairs, with professional fixes for simple problems often costing between $25 and $75 per item. By learning some basic repair techniques, you could potentially save hundreds of dollars each year while extending the life of your favorite pieces.
Essential Tools for DIY Jewelry Repair
Creating a simple jewelry repair kit at home can save you countless trips to the jeweler. The good news is that many household items can double as jewelry repair tools. Here's what your basic kit should include:
Fine-tipped tweezers for manipulating small parts Magnifying glass for better visibility Small pliers (needle-nose and round-nose) Super glue or jewelry adhesive Clear nail polish Soft polishing cloths Toothpicks for applying adhesive Small scissors Baking soda and aluminum foil (for silver cleaning)
According to jewelry repair specialists, having these basic tools on hand can help you address approximately 70% of common jewelry issues. The entire kit can be assembled for under $30, potentially saving you hundreds in professional repair costs over time.
Quick Fixes for Broken Chains and Necklaces
Temporary Clasp Replacements
One of the most frustrating jewelry problems is a broken clasp on a necklace or bracelet. When you're heading out the door and discover your favorite piece has a broken clasp, try this quick fix: use a small paper clip as a temporary jump ring or clasp. Simply open the paper clip with pliers, thread it through the end loops of your chain, and close it again.
For a more elegant solution that still takes less than five minutes, repurpose a clasp from an old, unworn piece of jewelry. According to jewelry repair statistics, clasps are the most commonly replaced component, accounting for approximately 41% of all jewelry repairs.
Fixing Broken Chains
When a chain breaks, many people immediately assume they need professional help. However, for simple breaks in the middle of a chain, you can often perform a quick repair yourself:
First, examine the break to determine if links are damaged or simply separated. For separated links, use two pairs of needle-nose pliers to gently open the broken link, remove it, and then reconnect the chain by opening and closing the adjacent links.
For more substantial damage, you might need to remove several links and reconnect the chain, making it slightly shorter. While this alters the original length, it's a practical solution when you're in a hurry. A survey of DIY jewelry repairers found that 78% were satisfied with their chain repair results, even when the repair resulted in a slightly shorter piece.
Untangling Knotted Chains
The frustration of untangling a knotted chain can be enough to make anyone consider tossing it out. Before you give up, try this method that professional jewelers use:
Sprinkle a small amount of baby powder or cornstarch on the knot to reduce friction. Place the chain on a flat, solid surface with good lighting. Use two fine sewing needles or straight pins to gently work the knot apart, starting from the outer loops and working inward. Be patient—according to jewelry care experts, rushing this process is the primary reason for chain damage during untangling attempts.
For particularly stubborn knots, try placing the chain on a piece of wax paper and working with it there—the slight tackiness helps keep the chain in place while you work. Statistics show that approximately 83% of knotted chains can be successfully untangled using these methods, saving an average repair cost of $20-45 per item.
Stone and Setting Repairs
Securing Loose Stones
Loose stones in rings, earrings, or pendants don't always require a trip to the jeweler. For non-precious stones in costume jewelry, a small amount of clear nail polish or specialized jewelry glue can secure the stone temporarily or even permanently.
To fix a loose stone: First, clean both the stone and setting with rubbing alcohol and allow to dry completely. Apply a tiny amount of adhesive to the setting using a toothpick for precision. Carefully place the stone in the setting and adjust its position with tweezers if needed. Allow the adhesive to cure completely according to the product instructions—usually 24-48 hours—before wearing the piece.
According to jewelry industry data, approximately 62% of loose stone issues in costume jewelry can be successfully addressed with proper adhesives. However, for precious stones or valuable pieces, temporary fixes should only be used until you can visit a professional jeweler.
Preventing Stone Loss
Prevention is always better than repair. To prevent stones from becoming loose in the first place, avoid exposing jewelry to harsh chemicals, extreme temperature changes, and physical impacts. Research indicates that proper jewelry care can extend the life of settings by up to 60%.
A simple preventative measure is to check your jewelry settings regularly by gently pressing on stones with a soft toothpick. Any movement indicates loosening that should be addressed promptly. Jewelry experts recommend this quick check monthly for frequently worn pieces.
Metal Cleaning and Restoration Techniques
Restoring Silver Jewelry
Tarnished silver jewelry is a common problem that's surprisingly easy to fix at home. A study by the Silver Institute found that improper storage causes approximately 70% of silver tarnishing issues, while the remaining 30% result from exposure to air pollutants and body chemistry.
For a quick silver cleaning solution: Line a bowl with aluminum foil (shiny side up), add one tablespoon of baking soda and one tablespoon of salt, then pour in enough hot water to cover your jewelry. The chemical reaction between these elements removes tarnish in minutes without abrasives that might scratch your pieces. After soaking for 5-10 minutes, rinse thoroughly and dry with a soft cloth.
For heavily tarnished pieces, you might need to repeat this process. According to consumer testing, this method effectively removes approximately 85-95% of tarnish from most silver jewelry items, comparable to commercial silver cleaning products that cost $8-15 per bottle.
Fixing Gold-Plated Jewelry
When gold-plated jewelry begins to show the base metal underneath, many people simply discard it. However, there are temporary fixes that can extend its life. Clear nail polish can be carefully applied to small areas where plating has worn away, preventing further deterioration and skin discoloration.
For more extensive wear, specialized gold-tone touch-up pens are available for under $10 and can restore the appearance of gold-plated items. While not a permanent solution, these quick fixes can extend the wearable life of costume jewelry by 6-12 months according to industry experts.
Earring Repairs and Modifications
Fixing Loose Earring Backs
Loose earring backs (or "clutches") are a common annoyance that can lead to lost earrings. To tighten metal earring backs, use a small screwdriver or the tip of scissors to gently press inward on the circular opening. This creates more tension when the back is placed on the earring post.
For plastic earring backs that have become loose, replacing them is usually the best option. However, in a pinch, a small piece of clear rubber earring stopper (often sold as "earring nuts") can be placed between the existing back and the ear to create more security.
According to a jewelry industry report, earring loss due to backing failure accounts for approximately 34% of all jewelry losses, with an estimated annual value of over $500 million in the United States alone. This simple fix can potentially save hundreds in replacement costs.
Converting Pierced Earrings to Clip-Ons
Need to wear a favorite pair of pierced earrings but your piercings have closed? This quick conversion takes less than five minutes. Purchase clip-on earring findings (available at craft stores for $3-5 per pair), remove any existing posts or hooks from your earrings using pliers, and attach the clip-on findings using jewelry adhesive.
This modification works particularly well for stud earrings and small dangles. According to consumer surveys, approximately 22% of women have converted earrings in this manner, with 89% reporting satisfaction with the results.
Bracelet and Watch Band Adjustments
Adjusting Watch Bands at Home
An ill-fitting watch band can make even the most expensive timepiece uncomfortable to wear. While removing links from metal watch bands traditionally required specialized tools, many modern watch bands can be adjusted using household items.
For pin-style links: Look for small arrows on the inside of the band indicating the direction to push the pins. Use a push pin or small nail to press the connecting pins out in the direction shown, removing as many links as needed for a comfortable fit. Then reconnect the band by reinserting the pins.
According to watchmakers, approximately 65% of watch band adjustments can be successfully performed at home, saving $15-30 in service fees each time. However, for expensive watches or complex band styles, professional adjustment is still recommended.
Extending Bracelet Length
Found the perfect bracelet that's just a bit too small? Instead of returning it or leaving it unworn, try this extension hack: Purchase a small length of matching chain and two jump rings from a craft store (total cost typically under $5). Use pliers to open the clasp end of the bracelet, attach a jump ring, add your extension chain, and connect the final jump ring to the clasp.
This modification creates an adjustable bracelet that can be worn at different lengths depending on your preference. According to jewelry designers, this technique can increase a bracelet's wearable size by 0.5-2 inches while maintaining its aesthetic appeal.
Preventing Future Jewelry Damage
Proper Storage Solutions
Proper jewelry storage can prevent many common issues before they start. A survey by the Gemological Institute of America found that improper storage contributes to approximately 47% of all jewelry damage.
For necklaces and bracelets, use individual pouches or hang them on a jewelry tree to prevent tangling. Store rings and earrings in compartmentalized containers to prevent scratching and loss. For silver pieces, anti-tarnish strips or bags can reduce tarnishing by up to 75% according to product testing.
The most effective storage solution doesn't need to be expensive—even repurposed pill organizers, ice cube trays, or egg cartons can provide adequate separation and protection for most jewelry items.
Daily Wear Considerations
How you wear your jewelry significantly impacts its longevity. Remove jewelry before swimming, showering, cleaning, or applying personal care products. According to metallurgists, exposure to chlorine can deteriorate gold alloys by as much as 10% annually, while certain cosmetic ingredients can accelerate tarnishing by up to 300%.
Make jewelry the last thing you put on and the first thing you take off each day. This simple habit can extend the life of your pieces by years, according to jewelry care experts.
When to Seek Professional Help
While DIY repairs can address many common jewelry issues, certain situations warrant professional attention:
Repairs to high-value pieces (generally over $100) Prong replacement or rebuilding Resizing of rings Restringing of pearl necklaces Repair of complex mechanisms in watches or clasps Deep scratches in gemstones Restoration of antique or heirloom pieces
According to jewelers, attempting these more complex repairs without proper training results in additional damage approximately 68% of the time, ultimately increasing repair costs by an average of 40-60%.
The Economics of DIY Jewelry Repair
Learning basic jewelry repair skills makes financial sense for most consumers. The average professional jewelry repair costs between $25 and $65 per item, with more complex repairs exceeding $100. By comparison, most DIY repairs cost less than $5 in materials and take under 30 minutes to complete.
A consumer spending analysis found that the average jewelry owner who learns basic repair techniques saves approximately $120-180 annually. Over a decade, these savings can exceed $1,500—enough to purchase several new quality pieces.
Environmental Impact of Jewelry Repair
Beyond the financial benefits, repairing jewelry rather than replacing it has significant environmental advantages. The mining and processing required for new jewelry production creates substantial environmental impact, with gold mining alone generating more than 20 tons of waste for each gold ring produced, according to environmental research.
By extending the life of existing jewelry through repairs, consumers can reduce demand for new raw materials. A sustainability study found that extending the usable life of jewelry by just 20% through repairs and proper care could reduce related environmental impacts by approximately 15-18%.
Conclusion: The Value of Jewelry Repair Skills
In our disposable culture, the ability to repair rather than replace items represents both practical wisdom and environmental responsibility. For busy individuals, learning quick jewelry repair techniques offers multiple benefits: saving money, preserving sentimental pieces, reducing waste, and experiencing the satisfaction of self-sufficiency.
The time investment to learn these basic skills is minimal compared to the ongoing benefits. Most of the techniques described in this guide can be mastered in less than an hour of practice, yet will serve you for decades to come.
Whether you're fixing a broken clasp five minutes before an important meeting or restoring the shine to a tarnished family heirloom on a quiet Sunday afternoon, these jewelry repair hacks empower you to maintain your accessories without disrupting your busy schedule.
By incorporating these simple repair techniques into your skill set, you'll not only extend the life of your jewelry collection but also gain confidence in your ability to solve problems creatively and efficiently—a valuable trait in all aspects of a busy life.
References
-
Jewelry Consumer Opinion Council: Annual Jewelry Care Survey
-
The Silver Institute: Silver Jewelry Care and Maintenance Guide
-
Gemological Institute of America: Jewelry Durability and Care
-
Environmental Impact Assessment of Precious Metals Mining and Processing