
Have you ever invested in a beautiful bracelet only to spend more time retrieving it from the floor than showing it off on your wrist? You're not alone. According to a recent jewelry industry survey, approximately 68% of bracelet wearers report issues with slippage, making it one of the most common jewelry frustrations consumers face.[1] Whether you're dealing with a precious family heirloom, an expensive designer piece, or a beloved everyday accessory, a bracelet that constantly slides off is not just annoying—it's a loss risk.
In this comprehensive guide, we'll explore proven techniques to keep your bracelet securely on your wrist. From simple at-home adjustments to professional solutions, you'll discover options for every bracelet type, wrist shape, and lifestyle need. By the end of this article, you'll have all the tools you need to enjoy your bracelet without constantly checking your wrist or retracing your steps to find where it fell.
Understanding Why Bracelets Slip Off
Before diving into solutions, it's important to understand why bracelets slip off in the first place. This knowledge will help you identify the most effective solution for your specific situation.
Wrist Anatomy and Sizing Issues
The human wrist is not a perfect cylinder—it tapers and has a more oval than round shape. This natural anatomy creates challenges for bracelet fit. Studies show that the average wrist size can fluctuate up to half an inch throughout the day due to factors like temperature, activity level, and water retention.[2]
Common sizing issues include:
-
Too large circumference: The most obvious cause—your bracelet is simply too big for your wrist
-
Incorrect shape: Round bracelets don't conform well to the naturally oval shape of most wrists
-
Lack of flexibility: Rigid bracelets can't adapt to wrist movement and may slide off during activity
-
Weight distribution: Heavy charms or focal points can cause a bracelet to rotate, creating slip opportunities
Material Factors
Different bracelet materials interact differently with your skin:
-
Metal bracelets (especially smooth ones like gold or sterling silver) provide little friction against skin
-
Plastic and acrylic can sometimes create static or stick to the skin, but generally slide easily
-
Fabric or cord bracelets often start with good grip but loosen over time
-
Beaded bracelets may offer better grip but can stretch with wear
Activity Impact
Research indicates that up to 42% of bracelet losses occur during specific activities.[1] High-risk scenarios include:
-
Removing gloves or sleeves
-
Washing hands or applying lotion
-
Exercising or playing sports
-
Carrying heavy bags or items
-
Gesturing animatedly during conversation
10 Effective Methods to Keep Your Bracelet Secure
1. Proper Sizing Techniques
The foundation of bracelet security is proper sizing. Here's how to get it right:
DIY Wrist Measurement:
-
Measure your wrist at different times of day
-
Use a flexible measuring tape or string
-
Allow for 1/4 to 1/2 inch of give (depending on bracelet style)
-
Consider measuring at the widest part of your hand if the bracelet must slide over it
Professional Sizing:
-
Jewelers can precisely measure and adjust most bracelet types
-
Consider seasonal adjustments if you experience significant fluctuation
According to jewelry industry standards, the ideal bracelet should be able to rotate on your wrist but not slide over your hand unless it's designed to be a bangle.[3]
2. Bracelet Guards and Stoppers
Bracelet guards are simple devices specifically designed to prevent slippage:
Silicone Bracelet Stoppers:
-
Small, transparent silicone rings that slide onto your bracelet
-
Position them at the ends of your bracelet to create a barrier
-
Inexpensive ($5-15 for a set) and available in various sizes
-
Nearly invisible on most bracelet styles
Metal Guards:
-
More durable option often used for expensive jewelry
-
Can be decorative elements that complement your bracelet
-
Usually require professional installation
-
Typically cost $20-50 depending on material
3. Adjustable Clasps and Closures
Upgrading your bracelet's closure mechanism can dramatically improve security:
Lobster Claw with Extender:
-
Provides adjustability for different wrist sizes or conditions
-
Allows for tightening during high-activity periods
-
Easy to operate single-handedly
Double-Lock Clasps:
-
Feature a secondary locking mechanism for added security
-
Reduce accidental openings by up to 85% compared to standard clasps[3]
-
Ideal for valuable bracelets or active lifestyles
Magnetic Clasps with Safety:
-
Combine ease of use with security features
-
Great for those with dexterity issues
-
Look for versions with mechanical backup locks
4. Size Adjustment Services and DIY Options
For permanent solutions:
Professional Resizing:
-
Jewelers can remove links from chain bracelets
-
Cuff bracelets can be gently compressed
-
Tennis bracelets can have links removed
-
Cost ranges from $15-75 depending on complexity
DIY Adjustments:
-
Link removal kits available for basic chain bracelets ($10-25)
-
Adjustable sliding knot techniques for cord bracelets
-
Wrap techniques that create a more secure fit
5. Bracelet Stacking for Increased Friction
A strategic approach to wearing multiple bracelets:
-
Stack complementary bracelets together to create friction
-
Alternate materials (smooth metal with textured beads, for example)
-
Position wider, more secure pieces at the bottom of the stack
-
Use a variety of sizes to create a natural stopping mechanism
This technique has gained popularity, with 78% of jewelry wearers reporting they stack at least 2-3 bracelets regularly.[4]
6. Bracelet Connector Solutions
For those who love multiple bracelets:
Bracelet Connectors:
-
Small devices that link multiple bracelets together
-
Prevent individual pieces from slipping off independently
-
Create a wider combined bracelet that's less likely to slide over the hand
-
Available in decorative styles that enhance your collection
Chain Guards:
-
Connect your bracelet to a ring or watch for added security
-
Particularly useful for valuable pieces
-
Can become a distinctive part of your jewelry style
7. Material Modifications for Better Grip
Enhance your bracelet's ability to stay in place:
Texture Additions:
-
Adding beads or charms creates natural stopping points
-
Engraving or pattern work increases skin friction
-
Wire-wrapping sections adds grip without altering the overall design
Grip-Enhancing Coatings:
-
Silicone spray (jewelry-safe versions) can increase friction
-
Clear nail polish on specific points creates subtle grip areas
-
Specialized jewelry coatings that add texture while protecting the piece
8. Inside-Wrist Wearing Technique
A simple position change can make a big difference:
-
Wearing bracelets on the inside of your wrist utilizes the natural "shelf" of your wrist bones
-
This position reduces the chance of bracelets catching on objects
-
Studies show bracelets worn inside the wrist experience 34% fewer accidental removals[1]
-
This technique works particularly well for cuff and bangle styles
9. Specialty Solutions for Different Bracelet Types
Each bracelet style has unique security options:
For Bangles:
-
Silicone or rubber inserts that line part of the inner circumference
-
Size reducers that sit inside the bangle to decrease effective diameter
-
Hinged designs that allow for a smaller opening while maintaining style
For Tennis Bracelets:
-
Safety chains that connect opposite sides of the bracelet
-
Figure-eight safety clasps that require intentional opening
-
Double-securing techniques that use both the primary clasp and a safety catch
For Charm Bracelets:
-
Even distribution of charms to prevent weight-related slipping
-
Heavier safety clasps that counterbalance charm weight
-
Stopper beads that prevent charms from sliding to one area
For Beaded Bracelets:
-
Elastic cord replacements that maintain tension
-
Double-stringing techniques for added durability
-
Specialized knots that create natural constriction points
10. Lifestyle Adaptations for Bracelet Security
Sometimes, minor habit changes can make a major difference:
Activity-Based Adjustments:
-
Remove or secure bracelets before high-risk activities
-
Apply lotion before putting on bracelets, not after
-
Be mindful during transitions (putting on/removing coats, gloves, etc.)
Regular Maintenance:
-
Check clasps and connections monthly
-
Clean bracelets to remove buildup that might affect fit
-
Inspect for stretching or deformation that could affect security
Special Considerations for Different Wrist Types
Small or Narrow Wrists
If you have particularly slender wrists:
-
Choose bracelets with adjustable closures
-
Opt for cuff styles that can be gently compressed
-
Consider children's sizes for some bracelet types
-
Look for "petite" or "small wrist" specific designs
According to jewelers, approximately 22% of adult women and 8% of men have wrists smaller than standard bracelet sizing accounts for.[5]
Large or Wide Wrists
For those with larger wrists:
-
Bracelet extenders add length to standard sizes
-
Layered or wrap bracelets offer customizable length
-
Choose designs with generous sizing or extension chains
-
Opt for bangle styles with hinged openings rather than solid designs
Tapered Wrists
If your wrist has a significant taper:
-
Bracelets with flexibility work better than rigid designs
-
Adjustable closures allow for custom positioning
-
Consider asymmetrical designs that account for wrist shape
-
Bracelet guards may be necessary at the narrowest point
DIY Bracelet Adjustments: Step-by-Step Guides
Creating a Simple Sliding Knot Adjuster
For cord, leather, or fabric bracelets:
-
Thread both ends of your bracelet through a small bead with a large hole
-
Tie a sliding knot on each side of the bead
-
Adjust the knots to tighten or loosen as needed
This creates an adjustable system that can be modified throughout the day as needed.
Making Your Own Silicone Bracelet Stopper
A budget-friendly DIY option:
-
Purchase clear silicone caulk (100% silicone, non-toxic)
-
Place a small dot on wax paper and allow to partially cure
-
Form into a small ring shape
-
Once fully cured, slide onto your bracelet
This creates a custom-sized stopper for virtually any bracelet type.
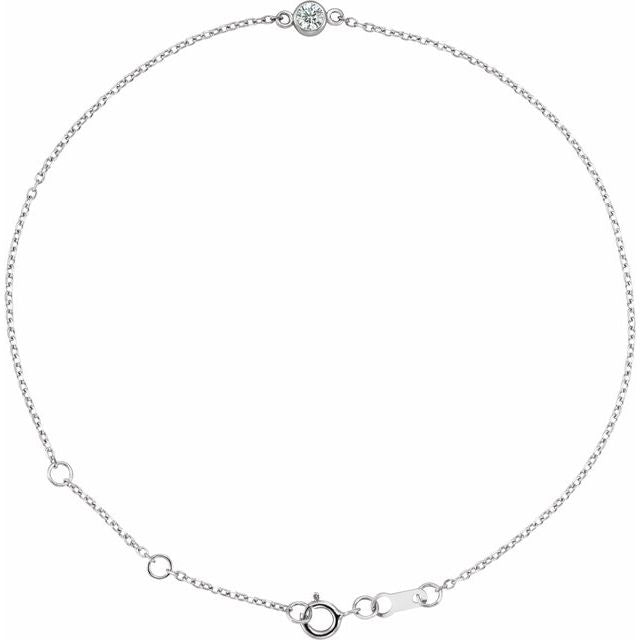
Adding a Safety Chain
For valuable bracelets:
-
Purchase a small length of matching chain and two jump rings
-
Attach one end to your bracelet's clasp with a jump ring
-
Attach the other end to the opposite side of your bracelet
-
Ensure the chain is long enough to allow the bracelet to be put on but short enough to prevent loss if the main clasp fails
When to Seek Professional Help
While many bracelet security issues can be addressed at home, some situations call for professional assistance:
Consult a jeweler when:
-
Dealing with valuable or antique pieces
-
Needing structural modifications to metal bracelets
-
Adding or modifying clasps or safety features
-
Resizing complex designs like tennis bracelets
Professional services typically available:
-
Precision sizing and link removal
-
Clasp upgrades and safety feature installation
-
Custom stopper creation that matches your bracelet
-
Repair of stretched or damaged bracelets affecting fit
The Cost-Benefit Analysis of Bracelet Security
Investing in bracelet security makes financial sense:
-
The average cost of securing a bracelet ranges from $5-50
-
The average cost of replacing a lost bracelet is significantly higher
-
Emotional value of heirloom or sentimental pieces is incalculable
-
Prevention is almost always less expensive than replacement
Conclusion
A beautiful bracelet should be enjoyed, not constantly monitored or repeatedly retrieved from the floor. With the right combination of sizing, security additions, and wearing techniques, you can keep your favorite wrist adornments exactly where they belong.
Remember that different bracelets may require different solutions, and your perfect strategy might involve combining several of the methods we've discussed. Whether you choose professional adjustments or DIY fixes, the peace of mind that comes from a secure bracelet is well worth the effort.